Buyer planning guide
Grab-and-Go Counter Stock Plan: Pack Sizes, Facings and Replenishment
Plan a grab-and-go counter assortment with a pack measurement sheet, worked shelf-layout example, four JINYU L cabinet sizes and separate reserve-stock records.
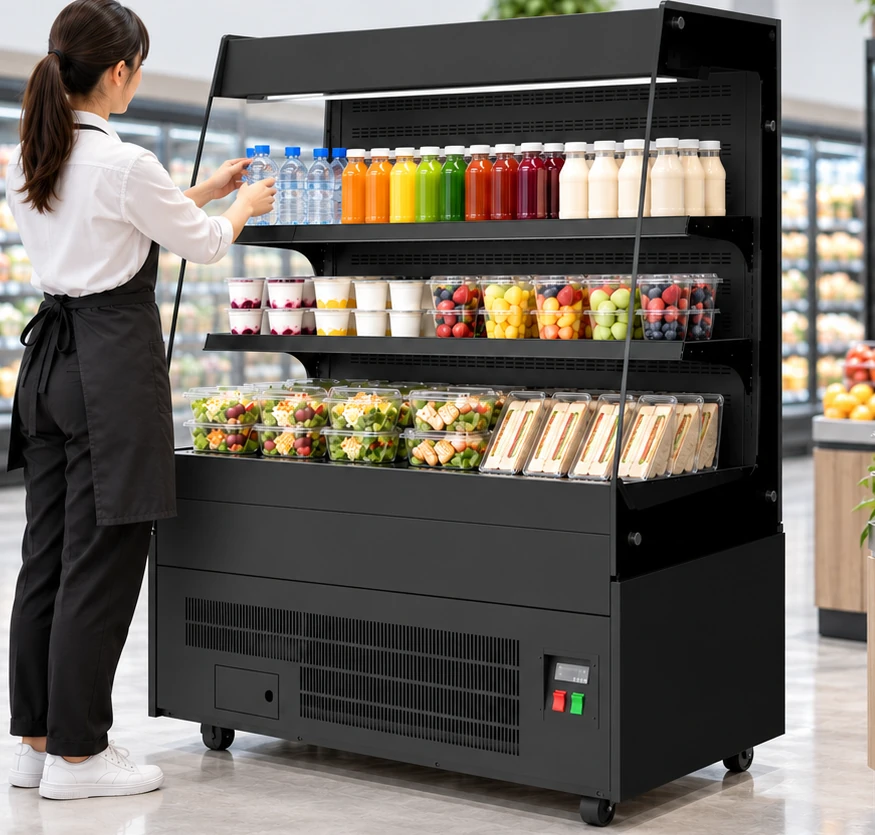
How do I plan stock for a grab-and-go counter?
Separate the items customers should see from the stock used to refill them. Begin with a list of finished packs: sandwiches, salad bowls, dessert pots or bottled drinks, according to your own menu. Give each item an identifier and record its actual outside dimensions. A menu name alone cannot describe the space taken by a projecting lid, bottle cap or paper sleeve. Photograph the item in the orientation you want customers to see.
Build the plan around visible product positions, then record reserve stock separately. This gives the purchasing team two questions to resolve: whether the intended assortment fits on the offered shelves, and how staff will replenish it during service. Use your own sales records or opening assumptions for quantities. A cabinet's listed litre capacity does not establish a sales forecast or a pack count.
What belongs in the product-pack measurement sheet?
For each item, record width, depth and height in millimetres, including closures and labels that project beyond the container. Add its filled weight, preferred facing, whether it is displayed upright or flat, and whether stacking is part of the intended presentation. Measure the finished item rather than an empty container that changes shape when filled. Keep a photograph beside the measurements so a supplier can understand which side faces the shopper.
Distinguish a product facing from a lane. One lane may hold several identical packs behind the front item, while a facing describes the visible selection position. Label mixed items separately even when their containers appear identical. Changes in sleeves or lids can change the layout. Date the sheet and identify the pack revision so the shelf drawing and the physical samples refer to the same assortment.
Which recorded cabinet figures can I use before obtaining shelf drawings?
The JINYU L series provides four starting points for a floor-standing open-front display. GN-900L measures 900 × 740 × 1400 mm and lists 235 L; GN-1000L measures 1000 × 740 × 1400 mm and lists 245 L. GN-1200L measures 1200 × 740 × 1400 mm with 295 L, and GN-1500L measures 1500 × 740 × 1400 mm with 365 L. Use these overall dimensions to shortlist a cabinet position beside the counter.
Keep the recorded cabinet figures apart from usable shelf dimensions. None of those widths gives the clear width between shelf obstructions, and the 740 mm cabinet depth is not a pack-loading depth. Request a shelf drawing for each shortlisted model, including available vertical positions and the model's loading instructions. Compare the same pack sheet against every returned drawing so a larger cabinet is judged by the assortment it can actually present.
| Model | Width × depth × height | Capacity | Rated power | Voltage / frequency |
|---|---|---|---|---|
| GN-900L | 900 × 740 × 1400 mm | 235 L | 820 W | 220-240V/50Hz |
| GN-1000L | 1000 × 740 × 1400 mm | 245 L | 840 W | 220-240V/50Hz |
| GN-1200L | 1200 × 740 × 1400 mm | 295 L | 950 W | 220-240V/50Hz |
| GN-1500L | 1500 × 740 × 1400 mm | 365 L | 1080 W | 220-240V/50Hz |
How does a worked shelf-layout calculation look?
Consider a hypothetical shelf with a verified usable rectangle of 720 × 360 mm and a pack measuring 120 × 180 mm in its intended orientation. A simple rectangular grid gives six packs across and two deep: twelve positions before other allowances. This is an arithmetic example only; 720 × 360 mm is not a recorded JINYU shelf measurement. Replace both shelf figures with the dimensions supplied for the selected cabinet.
Now rotate that hypothetical pack. Its footprint becomes 180 × 120 mm, giving four across and three deep, again twelve positions. The count is unchanged, but the visible front row falls from six facings to four. Decide which orientation presents the label correctly. Apply the actual shelf-edge, airflow and loading instructions before accepting a layout; a rectangle division alone cannot establish an approved loading arrangement.
How should I handle tall bottles and mixed pack heights?
Draw an elevation as well as a plan view. Record the tallest finished item assigned to each shelf position, including its cap or lid. Ask for usable vertical clearance at the offered shelf settings and show how the customer lifts or removes the item. A bottle that fits while standing still may need a different movement path from a shallow salad bowl. Include shelf-edge labels and signs on the elevation rather than treating them as details to add later.
Group items by the presentation you intend, then compare alternative shelf settings against that same list. Keep the supplier's loading and airflow information with the drawing. Do not convert the unused space above a short pack into permission to stack it. If stacking is proposed, identify the pack construction, filled weight and intended arrangement in the inquiry and request a response against that exact layout.
How do I separate opening display stock from replenishment stock?
Create two columns for each item: planned display quantity and reserve quantity. For example, an operator might choose eight visible packs and twelve reserve packs of one sandwich. That makes twenty packs in the operator's hypothetical stock plan; it does not show that twenty belong inside the display. Assign the reserve quantity to a separately identified storage position and record how it reaches the customer display.
Use a third column for the refill trigger chosen by the operator. This can be a count observed during a service trial, with the time and person responsible recorded beside it. Keep food handling procedures with the site's operating team. The equipment inquiry should describe the stock movement and ask for relevant cabinet instructions, while the purchasing comparison retains the distinction between cabinet capacity, displayed assortment and total site stock.
How do I check the plan during a physical loading trial?
Use representative finished packs and the offered shelf arrangement. Photograph the front view, the shelf from above and the removal path for tall items. Mark each photo with the model code, shelf setting and pack-sheet revision. Compare the planned number of facings with the actual arrangement, including labels and any obstructions shown in the drawing. Record which packs need a different orientation instead of silently changing the count.
Rehearse replenishment with the counter layout marked out. Show where a tray waits and whether a customer selecting a drink blocks the refill position. Keep damaged packs or revised sleeves out of the measurement set unless they represent the product actually being sold. After the trial, update the pack sheet and drawing together. A photo without a model and shelf-setting reference is difficult to use when comparing a second cabinet.
What should I send with a stock-loading inquiry?
Send the product-pack sheet, the intended facing count for each item, a proposed shelf sketch and a counter plan showing the display and reserve-stock positions. Identify the shortlisted L model codes. Include photographs of the finished packs with a scale reference and distinguish recorded measurements from hypothetical opening quantities. State the destination and site electrical supply so the equipment response addresses the actual project.
Request an annotated response against your item identifiers, showing any proposed changes in orientation or quantity. Keep this response with the equipment-selection and counter-layout guides. The resulting comparison ties the model choice to a measurable assortment instead of treating listed litres as a promise of how many products will fit.