Buyer planning guide
Grab-and-Go Counter Layout: Cabinet Dimensions and Worked Space Examples
Plan a grab-and-go counter with four JINYU L cabinet sizes, worked frontage and depth calculations, and separate space for payment, collection and replenishment.
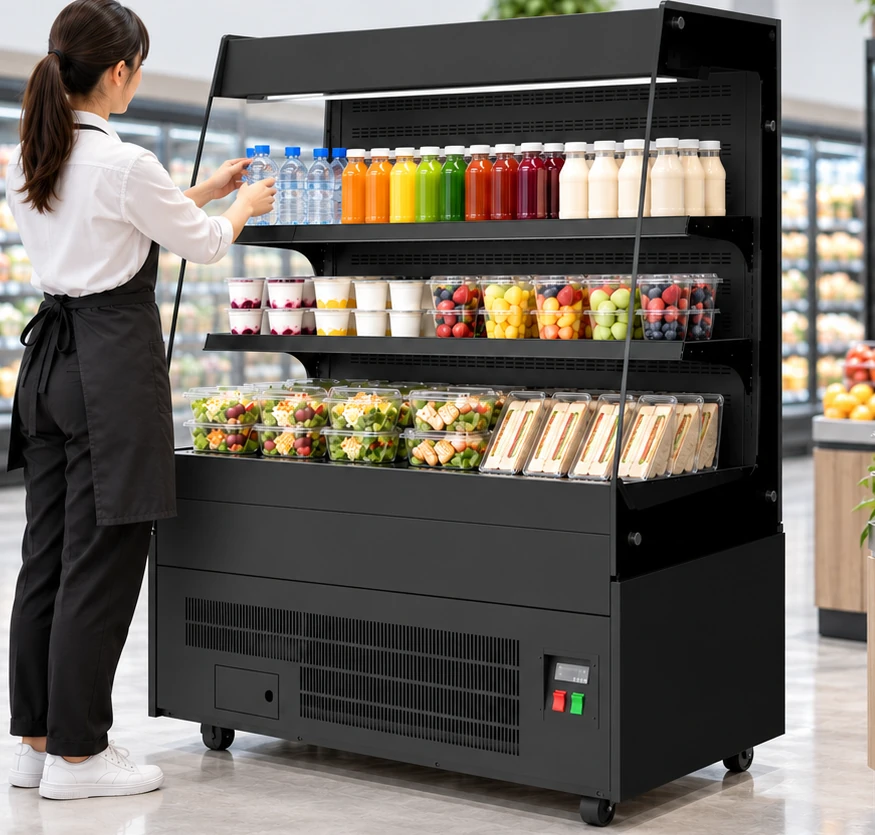
Check cooler frontage, till-drawer extension and total height behind a checkout counter with a worked layout and editable worksheet.
How much space does a grab-and-go counter need?
Start with three measurements: the wall or counter frontage, the room depth measured perpendicular to it, and the route used to bring equipment inside. A cabinet footprint answers only part of the question. Draw the payment counter, refrigerated display and collection surface as separate rectangles, then mark where customers and staff stand. Include doors and their opening arcs.
This guide uses the recorded JINYU L-series dimensions to work through the layout arithmetic. The examples describe hypothetical rooms and counters, rather than recommended installation sizes. Add the selected model's required ventilation, connection and service spaces from its installation drawing before treating a sketch as a proposed equipment bay.
Which cabinet dimensions should I put on the drawing?
Use width × depth × height in a single unit throughout the plan. GN-900L measures 900 × 740 × 1400 mm and has a listed capacity of 235 L. GN-1000L measures 1000 × 740 × 1400 mm with 245 L; GN-1200L measures 1200 × 740 × 1400 mm with 295 L; GN-1500L measures 1500 × 740 × 1400 mm with 365 L.
These are freestanding displays. Draw their bases on the floor beside the counter, and show the 1400 mm height on an elevation. Keep shelves, signs and adjacent counter heights visible in that elevation. A matching width does not turn a floor-standing cabinet into an appliance that can sit on a countertop.
What fits along a hypothetical 2400 mm frontage?
Suppose a straight frontage measures 2400 mm and the proposed payment counter occupies 1200 mm. The remaining frontage is 1200 mm before allowing for gaps or service access. A 900 mm cabinet leaves 300 mm of unallocated width, a 1000 mm cabinet leaves 200 mm, and a 1200 mm cabinet uses the entire remainder. A 1500 mm cabinet exceeds that remainder by 300 mm.
Write these figures on the sketch as dimensional differences. The 300 mm remainder beside GN-900L is not an approved clearance, and an exact 1200 mm match does not establish that GN-1200L can be installed there. Request the model drawing, then allocate every required gap before choosing the final counter length or cabinet.
How do I calculate the space in front of the chiller?
Measure from the wall behind the proposed cabinet to the nearest opposite obstruction. In a hypothetical 2200 mm-deep strip, subtracting the L cabinet's 740 mm depth leaves 1460 mm. That is a gross remainder before any rear installation allowance, opposing furniture, queue barriers or other projections. Label it that way on the drawing.
Mark the actual front edge after installation space has been included. Then review where a shopper stands to read a label, where another person passes and where staff place a replenishment trolley. Obtain the applicable access requirements from the people responsible for the site. The subtraction establishes a geometric remainder; it does not set an aisle standard or demonstrate that a queue can occupy it.
Should payment and order collection share the display frontage?
Show the two activities separately even when one staff member handles both. Use arrows to trace a shopper selecting a chilled pack, reaching payment and collecting any prepared item. Mark the stopping point for each activity. Check whether someone waiting for a prepared order would stand directly in front of the chilled shelves or block another customer's approach.
Try the sketch at full scale with tape on the floor and movable markers for the counter edges. Include the space occupied by people and a refill tray. Record where the proposed sequence breaks down, then change the arrangement before requesting the final drawing. Keep the collection surface distinct from any refrigerated position required for the actual products.
How do I reserve space for replenishment and cleaning?
Draw the path from reserve storage to the open front, including the place where staff turn or park a tray. The customer opening is also an access point during replenishment, so a display that fits geometrically can still be awkward to use during service. Show the route on the same plan as the payment queue rather than reviewing the two independently.
Ask for the cabinet's service-access and cleaning instructions, identifying which faces must remain accessible. Put removable adjacent furniture on the drawing if it is part of the access plan. Keep the site electrical connection location visible, and ask for the selected configuration's documents. Do not infer connection positions or maintenance clearances from the lifestyle photograph.
Does a wider cabinet guarantee more packs on display?
Use the listed capacities to compare the cabinets, then request usable shelf measurements for a pack layout. GN-900L and GN-1000L differ by 100 mm in cabinet width but only 10 L in listed capacity. GN-1200L is 200 mm wider than GN-1000L and lists 50 L more. Those differences do not describe shelf width or the number of products that can be presented.
Measure the outside of each finished pack, including lids and labels, and identify its display orientation. Request shelf dimensions and loading guidance for the offered model. Keep reserve stock outside the display count. A frontage calculation and a pack-layout drawing answer different questions; retain both when deciding whether the larger cabinet earns its place in the room.
What layout information should I send with an inquiry?
Send a dimensioned floor plan, an elevation of the counter run and photographs labelled with the same equipment positions. Identify the shortlisted L model, measured frontage, room depth, neighbouring furniture and delivery-route restrictions. Add the product-pack list and mark customer selection, payment, collection and staff replenishment on the plan. Give each drawing a revision reference.
Ask for the selected cabinet drawing, installation clearances, usable shelf dimensions and electrical documents. Request a response against your position labels so the cabinet, counter designer and receiving team use the same layout. Carry the returned dimensions into the next drawing revision before deciding that the proposed arrangement fits.
Reference sources
- Plan stock loading and shelf facings
- Choose grab-and-go counter equipment
- Compare L-series dimensions and configurations
- Plan aisles and replenishment access
- Prepare site photographs and measurements
- Send your counter layout inquiry
Regional references support general planning; model-specific specifications come from the published JINYU model tables.